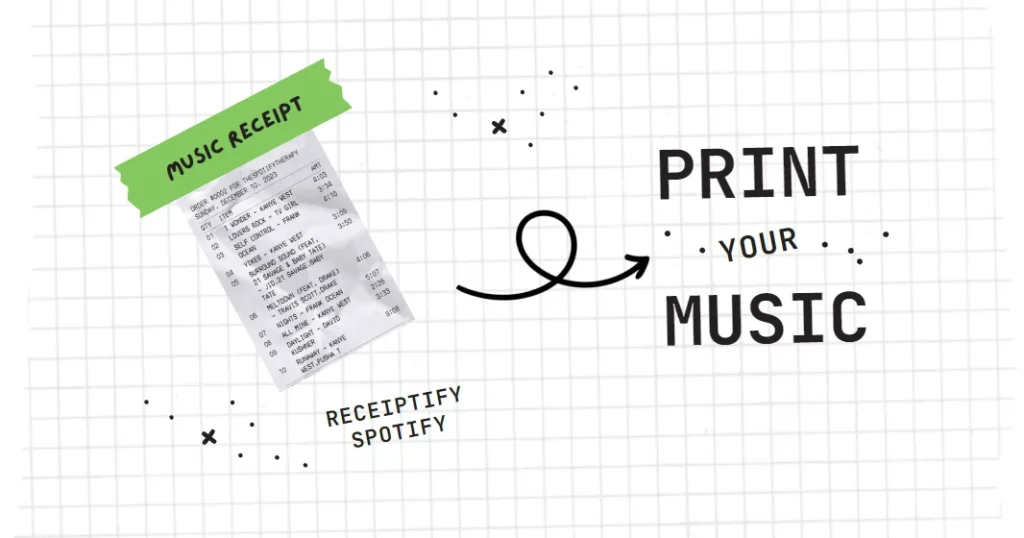
Receiptify, a web application, has taken the world by storm, revolutionizing the way music enthusiasts interact with their cherished playlists. Developed by Michelle Lui, this innovative platform converts users’ Spotify playlists into visually stunning ‘receipt’ illustrations, captivating millions worldwide.
At its core, Receiptify empowers users to generate personalized ‘tickets’ detailing their listening habits across various music platforms, including Spotify and Apple Music. By selecting a preferred timeframe (recent month, half-year, or all-time), users can craft a unique visual representation of their musical journey.
Each ‘Item’ on the receipt corresponds to a song title and its performer, while the ‘Price’ reflects the song’s play count, and the ‘Quantity’ denotes the track’s length. With a simple click, users can download and save their detailed ticket as a PNG file, ready to share with friends, family, and fellow music enthusiasts across social media platforms.
Inspired by the imaginative Instagram account @albumreceipts, Receiptify caters to the modern millennial yearning for a stylish and unique way to explore their musical tastes. By transforming chart-topping albums into tidy receipt-style lists, complete with track lengths and attributions, Receiptify offers a whimsical and engaging experience for music lovers.
How to Use Receiptify for Spotify?
Receiptify makes discovering your music listening insights super easy, whether you use it on a computer or mobile device. Here’s how the process works:
Use Receiptify on Desktop
Step 1: Visit Receiptify Website
Go to receiptify.herokuapp.com, a secure and user-friendly site made for a smooth experience.
Step 2: Connect Music Account
Click “Connect via Spotify” or “Connect via Apple Music” button for your preferred streaming service.
Step 3: Grant Access
Log into your music account when prompted and allow Receiptify to securely access your listening history.
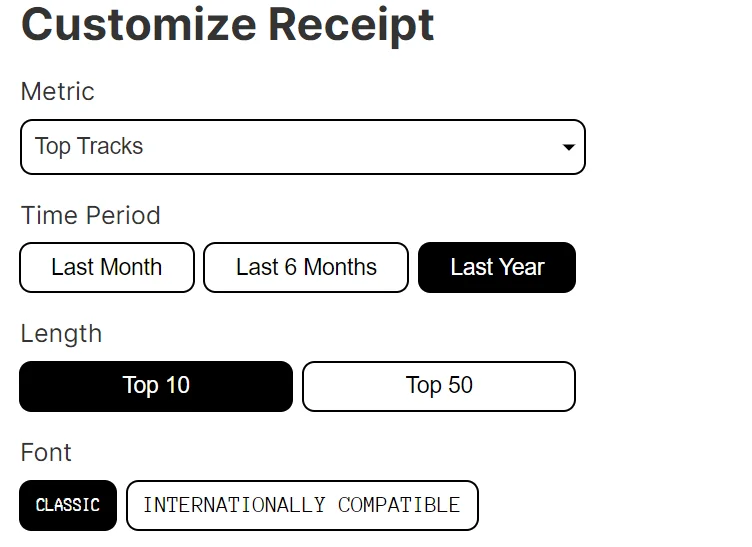
Step 4: Choose Time Range
Pick your desired timeframe – Last Month, 6 Months, or All-Time – to set the scope of your insights.
Step 5: Receiptify Processes Data
Receiptify will now process your data, digging into your listening habits and music preferences.
Step 6: View Your Receipt
After a few seconds, your unique music streaming receipt will appear! Explore the visual breakdown of your musical journey.
Step 7: Share
To share with friends, click ‘Share’ and choose how – social media, messaging, etc.
Use Receiptify on Mobile
Step 1: Download Receiptify App
For mobile, download the Receiptify app on your Android or iOS device.
Step 2: Connect Music Account
Open the app and log in with your Spotify or Apple Music account, granting access to your listening data.
Step 3: Choose Time Range
Just like desktop, pick your preferred timeframe for analysis.
Step 4: View Your Receipt
Receiptify will instantly generate your portable receipt with key insights.
Step 5: Explore Insights
Tap your receipt to dive into details like top artists, played tracks, genres, and more.
Step 6: Share
To share, tap ‘Share’ and Receiptify lets you post seamlessly to social media or friends.
Whether using desktop or mobile, Receiptify guides you smoothly through creating and sharing personalized music receipts revealing your unique listening journey.
How to Download Receiptify Receipts?
By downloading your Receiptify receipt, you unlock the ability to share it. Here’s how to download your receipts:
Step 1: Generate Your Receipt
After your music receipt is generated, you’ll see the option to download it.
Step 2: Click “Download”
Simply click or tap the “Download” button.
Step 3: Save Image File Locally
Receiptify will provide a high-quality, shareable image file for you to save to your local device.
How to Share Your Receipts on Social Media?
After generating your personalized Receiptify music receipt, sharing this visual snapshot of your musical tastes and streaming habits is just a few taps away. Receiptify makes it seamless to share your receipt on popular social media platforms, sparking conversations and connecting with others over the music you love. Here’s how to share your receipts:
Step 1: Locate the “Share” Button
Once your Receiptify receipt is ready, you’ll notice a prominent “Share” button.
Step 2: Choose Your Platform
Click or tap “Share” and select your preferred social media platform like Instagram, Facebook, Twitter, and more.
Step 3: Customize Your Share
Receiptify will integrate with the platform’s native sharing window. Here, you can craft a personal caption to accompany your music stats and tag @receiptifysite.
Step 4: Share Your Receipt
After adding your own flair, hit “Share”! Your Receiptify receipt is now live for friends and followers to explore and engage with.
Don’t let your unique musical insights go unnoticed! Sharing your Receiptify receipt ignites engaging conversations around the songs and genres that define your life. Tap “Share” today and watch your social circles light up over the music you love.
Why Every Spotify User Needs Receiptify?
Utilizing Receiptify for Spotify offers numerous advantages for music enthusiasts. This innovative tool provides insightful analysis into your most-listened-to artists and music genres, allowing you to gain a deeper understanding of your musical preferences. Exploring the reasons behind your affinity for specific types of music can be a particularly fascinating journey of self-discovery.
Here are some key benefits of using Receiptify for Spotify:
Intuitive Interface
Receiptify boasts a user-friendly interface that makes it easy for users to navigate and generate their receipts.
Integration with Popular Streaming Services
By seamlessly integrating with Spotify and Apple Music, Receiptify ensures a broad user base and access to a wide range of listening data.
Customizable Timeframes
Users can choose to generate receipts for various timeframes, including the past month, six months, or their entire listening history, providing flexibility and personalization.
Detailed Listening Insights
Receiptify provides valuable insights into a user’s listening habits, such as their most-played artists, genres, and tracks, enabling them to better understand their musical preferences.
Social Sharing
The ability to share receipts on social media platforms fosters a sense of community and encourages music-related discussions and discoveries.
Frequently Asked Questions (FAQs)
Q: What does the amount mean in top artists and genres?
A: In the section displaying your top artists, the amount represents the popularity of each artist on a scale from 1 to 10, with 1 being the least popular and 10 being the most popular. For top genres, the amount indicates the number of times a particular genre appears among your top 50 artists.
Q: My Spotify most-played doesn’t look right! How are these stats determined?
A: The short answer is that the exact calculation method for these stats is unknown. Receiptify uses data directly collected by Spotify for top artists in the past month, past 6 months, and all-time.
Q: Can you show the number of times a track is played in Spotify Receiptify?
A: Unfortunately, the Spotify API does not provide this information.
Q: Why is my Receiptify not working?
A: On occasions, the Receiptify platform may experience errors when there is a surge in traffic. If you have already logged in, try refreshing the site repeatedly until your receipt becomes visible. Should this approach prove unsuccessful, consider clearing your cookies and site data, or attempt to access Receiptify from an alternative device.
Q: Is Receiptify available for both iOS and Android users?
A: Yes, Receiptify can be accessed and used by both iOS and Android users through their respective web browsers or mobile applications.
Q: How do I integrate Receiptify with Apple Music?
A: To integrate Receiptify with Apple Music, simply log in to the Receiptify website, choose the ‘Login’ option, and follow the prompts to authorize access to your Apple Music account. Once authorized, you can select the desired listening period and generate your receipt.
Q: Is Receiptify secure?
A: Yes, Receiptify is designed to be a secure platform. It integrates seamlessly with Spotify and Apple Music, ensuring that your account information and listening data are handled securely and with utmost privacy.